

Alta Via 3
Trek description
Trek overview
Alta Via 3 crosses the central Dolomites from Villabassa to Longarone, following a long-distance alpine route of roughly 108 km divided into eight stages. Compared to Alta Via 1 or 2, it is less frequented and less uniform, moving through a wide range of landscapes. The trail passes through forested valleys, high pastures and limestone basins, connecting several distinct mountain groups along the way.
The route passes areas such as Cristallo, Sorapiss, Monte Rite or the Bosconero group. Alta Via 3 is intended for experienced hikers and includes Via Ferrata Francesco Berti rated as C on the Sorapiss massif, featuring equipped passages across exposed ground. Confident movement, sure footing and prior alpine experience are essential. The challenge lies in the route’s length, cumulative elevation and variety of terrain.
Highlights
- Monte Pelmo, Cristallo and Sorapìss mountain groups
- Remote sections toward Monte Rite and Bosconero
- Varied terrain from forests to high limestone basins
- Less crowded than Alta Via 1 or 2
- Traditional rifugios and historic WWI paths
Why this trek?
Alta Via 3 offers a broader and more varied view of the Dolomites than the more structured classic routes. Instead of following a single iconic line, it links multiple regions with different terrain, atmosphere and pace. The trek suits hikers who prefer long-distance travel through changing landscapes, with quieter sections and a strong sense of progression across the range.
Access & logistics
Start: Villabassa (Niederdorf) – accessible by train from Bolzano, Innsbruck or Venice via Fortezza. Local buses connect the station to the village center.
Finish: Longarone – reached by bus or train, with direct connections to Belluno and Venice.
Nearest airports: Innsbruck (INN) / Venice (VCE) / Verona (VRN)
Terrain & trail conditions
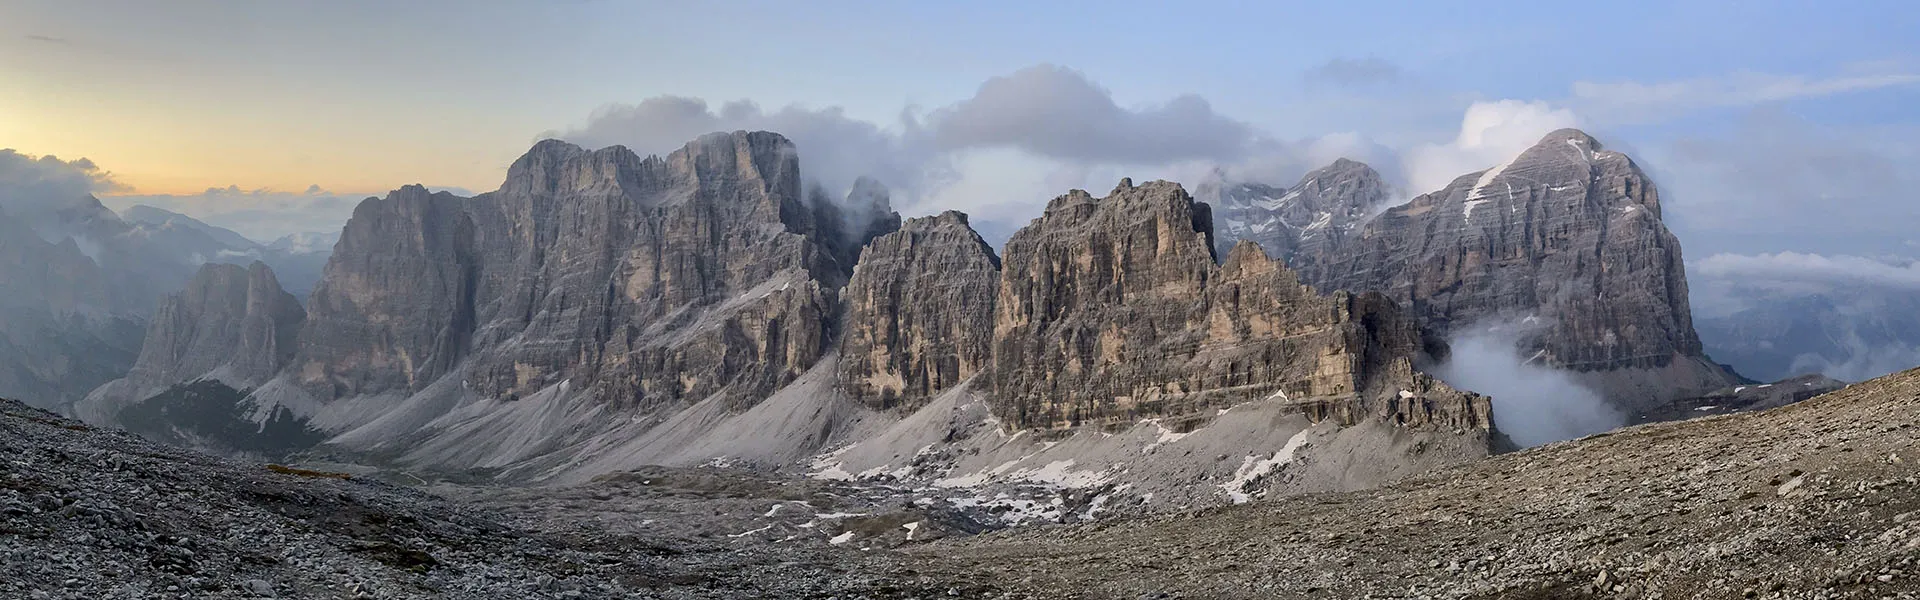
The path combines rocky Dolomite terrain with forest tracks and high pastures. It crosses the Cristallo and Sorapiss groups, passes around Monte Pelmo and then transitions into calmer, forested traverses in north section. The limestone surface varies from compact slabs to loose gravel, while lower sections follow earth paths and forest ground under pine and beech.
AV3 includes exposed Via Ferrata Francesco Berti graded as C, as well as some shorter stretches of ladders and metal footholds. After storms, wet limestone becomes slippery and watercourses can swell. Weather conditions can change quickly, especially at higher elevations.
Water & food resupply
Mountain huts provide meals and drinks throughout most of the route, but distances between them are longer than on Alta Via 1. Carrying at least two liters of water is recommended, especially on the Cristallo and Pelmo sections, where natural water sources are limited and often unreliable. Simple meals, coffee and basic supplies can be found in huts and small valley villages when the trail drops lower. Food is homely and traditional – soups, polenta, cheese. There are no large shops directly on the high route, so resupply mainly depends on hut kitchens, with a practical valley resupply option in San Vito di Cadore along the way.
Sleeping
Accommodation consists mainly of rifugios, smaller and often quieter than on the busier routes. Some sections include basic bivouacs that can be used in poor weather or when huts are full. Reservations are highly recommended in July and August. Camping is not officially permitted in the Dolomites.
Elevation & acclimatization
Altitude varies from roughly 950 m (3 100 ft) in the valleys to about 2 700 m (8 850 ft) at the highest passes near Sorapiss. The trek involves around 9 000 m (29 00 ft) of ascent and 9 600 m (31 600 ft) of descent. The cumulative elevation and frequent climbs make this a physically demanding trek requiring good endurance. Acclimatization is generally not an issue, though the rhythm of long ascents followed by quick drops can be tiring. Keeping an even pace and drinking enough water helps maintain balance.
Permits & regulations
No special permit is required. Parts of the route lie within protected areas, where wild camping is restricted. Respect local rules and follow trail signage, as markings may vary between provinces. Some sections cross old WWI paths or historical sites where it is best to stay on the main trail.
Season & timing
The best season is from mid – July to mid September. Early July may still bring snow on north-facing slopes, while October days become cold and short with a high probability of snow. The atmosphere changes through the season – green valleys in July, crisp air and golden larch in September. Afternoon storms are common but brief. The light softens toward the end of summer, adding warmth to the pale limestone.
Gear & preparation
Light alpine gear fits best – sturdy boots with good grip, a reliable waterproof jacket, layered clothing and trekking poles for long descents. Due to the via ferrata section, a helmet, harness and via ferrata set are required. A sleeping liner is required in huts. Carrying a headlamp and power bank helps on longer or more remote stages. Maps or offline GPS track are recommended too. The route is manageable with a moderate pack, but weather awareness and self-reliance are important.
Safety & difficulty
Alta Via 3 is physically demanding and includes technically exposed, equipped sections. Most objective risk comes from fatigue, poor visibility and slippery limestone after rain. Those comfortable with some exposure, repeated climbs of around 1 000 m (3 300 ft) and long days on mixed terrain will find the route within reach. Its quieter nature means fewer hikers nearby, so sound judgement, timing and weather awareness matter. Weather conditions can change quickly, bringing sharp contrasts between clear mornings, afternoon storms and calm evenings.
Trail knowledge
Description status
Report an issue


Details
Distance and elevation figures for this trek are calculated from a custom GPX track created specifically for this route. Other public sources may show different numbers.
Map
View list
Planner
Downloads
Free trail info, no ads, no paywalls. GPX sales are what make this possible. Thank you for your support!

Alta Via 3 - GPX Basic
GPX track with embedded elevation data — the same route used in the Trek’n’Trails map. Simple navigation reference, no extra waypoints.

Alta Via 3 - GPX Premium
Complete GPX for Alta Via 3 route in the Dolomites, Italy. Includes detailed waymarks for huts, passes, water sources, summits and key navigation points – including the Via Ferrata Francesco Berti.
Similar treks


Planning Tools
Get the most out of your trek with these planning tools. Each works independently – use them together or pick just what you need.
Start here
Find and compare treks that match your style

Trail wizard
Find curated treks that match the current season, terrain and vibe. A simple way to discover what’s worth hiking right now - no planning, just click and explore.
Find your trek →
Side by side
Compare treks using the main metrics. Check distance, elevation, season and difficulty across different routes in one clear view.
Compare treks →Plan your route
Break down your trek into manageable stages

Get ready
Prepare your gear, budget and nutrition for the journey

Cost calculator
Estimate the full cost of your trek from flights to huts and permits. Track spending, handle multiple currencies and export your plan as PDF or CSV.
Count expenses →
Pack builder
Build and manage your gear list with live weight tracking. Compare setups, tweak items and keep your base weight under control for any trek.
Prepare your gear →
Food planner
Calculate the ideal balance of calories and weight for your trip. Plan daily intake, compare food options and optimize your total pack food load.
Plan your meals →Trek description
Trek overview
Alta Via 3 crosses the central Dolomites from Villabassa to Longarone, following a long-distance alpine route of roughly 108 km divided into eight stages. Compared to Alta Via 1 or 2, it is less frequented and less uniform, moving through a wide range of landscapes. The trail passes through forested valleys, high pastures and limestone basins, connecting several distinct mountain groups along the way.
The route passes areas such as Cristallo, Sorapiss, Monte Rite or the Bosconero group. Alta Via 3 is intended for experienced hikers and includes Via Ferrata Francesco Berti rated as C on the Sorapiss massif, featuring equipped passages across exposed ground. Confident movement, sure footing and prior alpine experience are essential. The challenge lies in the route’s length, cumulative elevation and variety of terrain.
Highlights
- Monte Pelmo, Cristallo and Sorapìss mountain groups
- Remote sections toward Monte Rite and Bosconero
- Varied terrain from forests to high limestone basins
- Less crowded than Alta Via 1 or 2
- Traditional rifugios and historic WWI paths
Why this trek?
Alta Via 3 offers a broader and more varied view of the Dolomites than the more structured classic routes. Instead of following a single iconic line, it links multiple regions with different terrain, atmosphere and pace. The trek suits hikers who prefer long-distance travel through changing landscapes, with quieter sections and a strong sense of progression across the range.
Access & logistics
Start: Villabassa (Niederdorf) – accessible by train from Bolzano, Innsbruck or Venice via Fortezza. Local buses connect the station to the village center.
Finish: Longarone – reached by bus or train, with direct connections to Belluno and Venice.
Nearest airports: Innsbruck (INN) / Venice (VCE) / Verona (VRN)
Terrain & trail conditions
The path combines rocky Dolomite terrain with forest tracks and high pastures. It crosses the Cristallo and Sorapiss groups, passes around Monte Pelmo and then transitions into calmer, forested traverses in north section. The limestone surface varies from compact slabs to loose gravel, while lower sections follow earth paths and forest ground under pine and beech.
AV3 includes exposed Via Ferrata Francesco Berti graded as C, as well as some shorter stretches of ladders and metal footholds. After storms, wet limestone becomes slippery and watercourses can swell. Weather conditions can change quickly, especially at higher elevations.
Water & food resupply
Mountain huts provide meals and drinks throughout most of the route, but distances between them are longer than on Alta Via 1. Carrying at least two liters of water is recommended, especially on the Cristallo and Pelmo sections, where natural water sources are limited and often unreliable. Simple meals, coffee and basic supplies can be found in huts and small valley villages when the trail drops lower. Food is homely and traditional – soups, polenta, cheese. There are no large shops directly on the high route, so resupply mainly depends on hut kitchens, with a practical valley resupply option in San Vito di Cadore along the way.
Sleeping
Accommodation consists mainly of rifugios, smaller and often quieter than on the busier routes. Some sections include basic bivouacs that can be used in poor weather or when huts are full. Reservations are highly recommended in July and August. Camping is not officially permitted in the Dolomites.
Elevation & acclimatization
Altitude varies from roughly 950 m (3 100 ft) in the valleys to about 2 700 m (8 850 ft) at the highest passes near Sorapiss. The trek involves around 9 000 m (29 00 ft) of ascent and 9 600 m (31 600 ft) of descent. The cumulative elevation and frequent climbs make this a physically demanding trek requiring good endurance. Acclimatization is generally not an issue, though the rhythm of long ascents followed by quick drops can be tiring. Keeping an even pace and drinking enough water helps maintain balance.
Permits & regulations
No special permit is required. Parts of the route lie within protected areas, where wild camping is restricted. Respect local rules and follow trail signage, as markings may vary between provinces. Some sections cross old WWI paths or historical sites where it is best to stay on the main trail.
Season & timing
The best season is from mid – July to mid September. Early July may still bring snow on north-facing slopes, while October days become cold and short with a high probability of snow. The atmosphere changes through the season – green valleys in July, crisp air and golden larch in September. Afternoon storms are common but brief. The light softens toward the end of summer, adding warmth to the pale limestone.
Gear & preparation
Light alpine gear fits best – sturdy boots with good grip, a reliable waterproof jacket, layered clothing and trekking poles for long descents. Due to the via ferrata section, a helmet, harness and via ferrata set are required. A sleeping liner is required in huts. Carrying a headlamp and power bank helps on longer or more remote stages. Maps or offline GPS track are recommended too. The route is manageable with a moderate pack, but weather awareness and self-reliance are important.
Safety & difficulty
Alta Via 3 is physically demanding and includes technically exposed, equipped sections. Most objective risk comes from fatigue, poor visibility and slippery limestone after rain. Those comfortable with some exposure, repeated climbs of around 1 000 m (3 300 ft) and long days on mixed terrain will find the route within reach. Its quieter nature means fewer hikers nearby, so sound judgement, timing and weather awareness matter. Weather conditions can change quickly, bringing sharp contrasts between clear mornings, afternoon storms and calm evenings.
Trail knowledge
Description status
Report an issue
Details
Distance and elevation figures for this trek are calculated from a custom GPX track created specifically for this route. Other public sources may show different numbers.